Fuel tank or Fool tank – what could possibly go wrong?

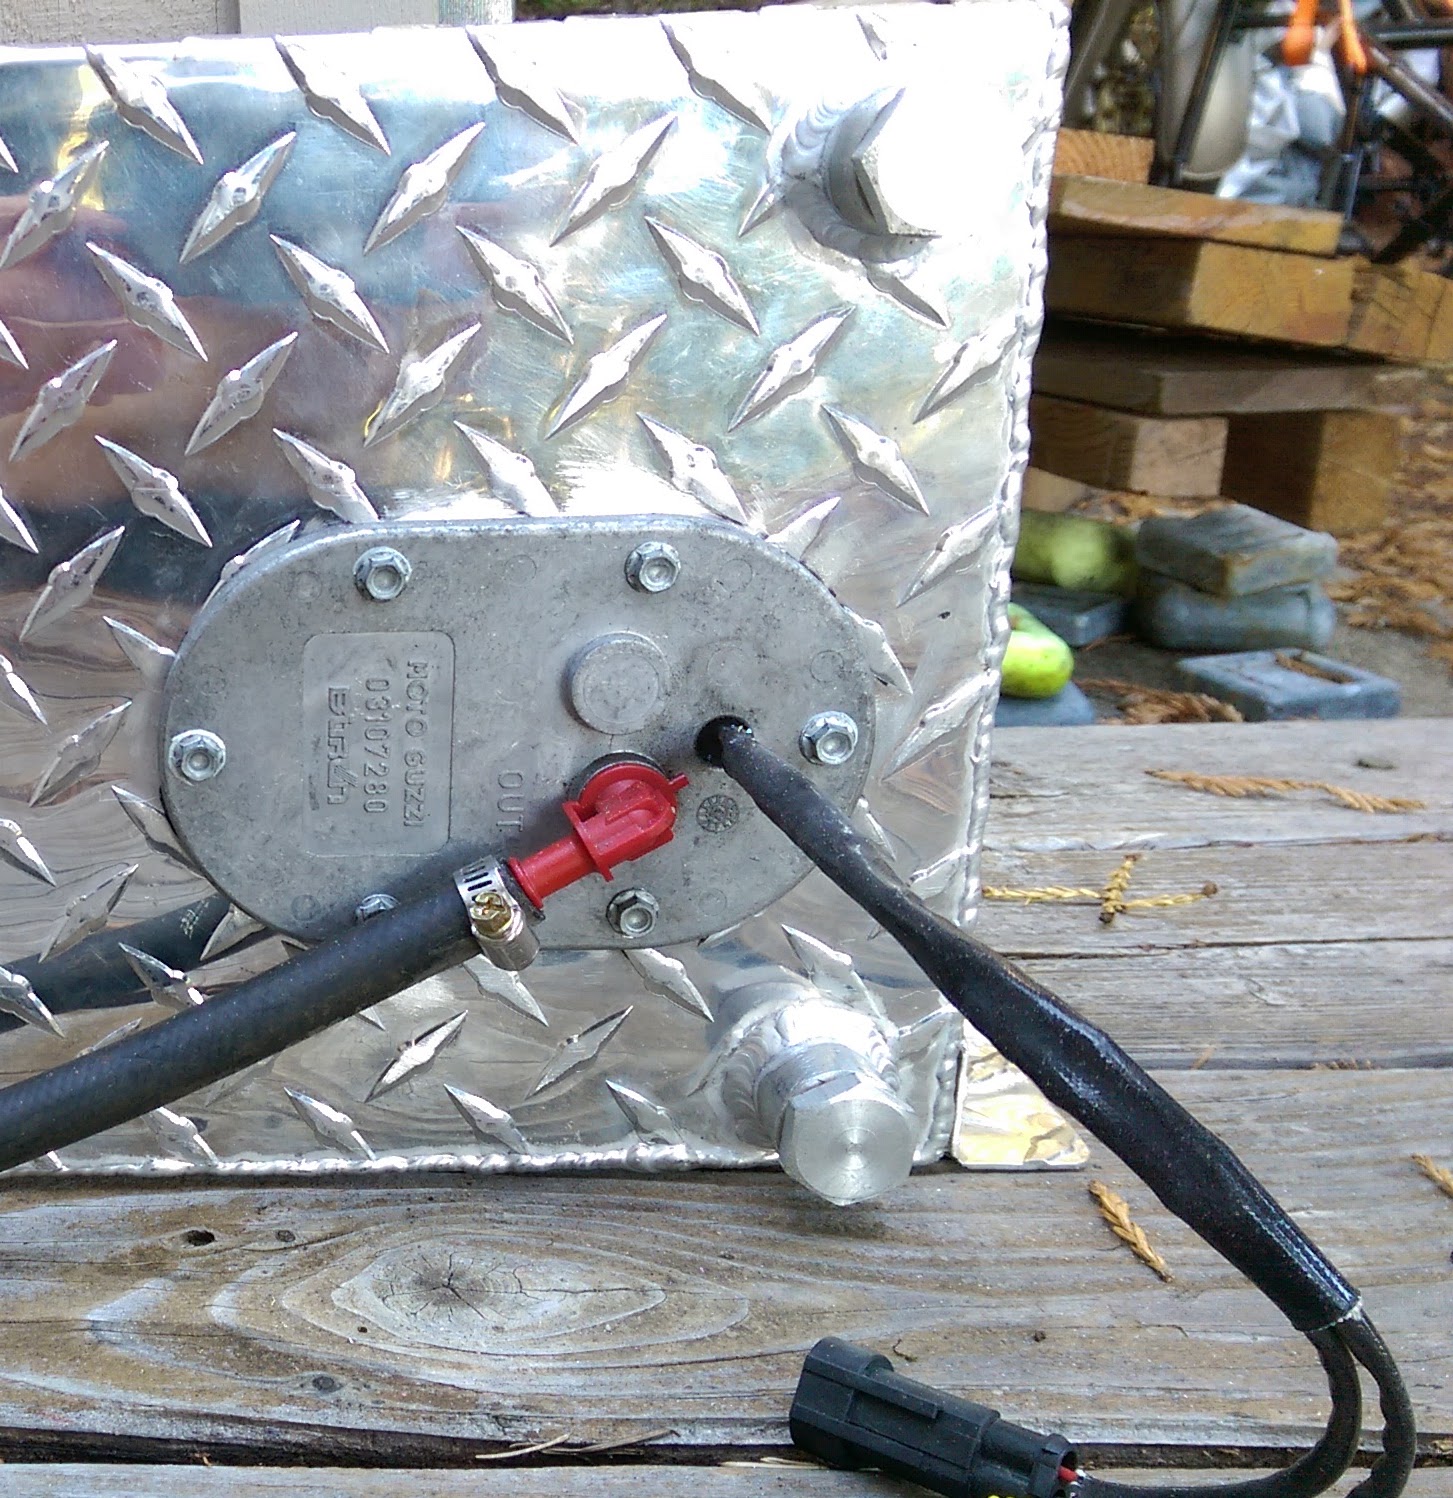
The donor bike is fuel injected, and in 2003 they had an in-tank fuel pump arrangement (1).

2016-09-17_1713

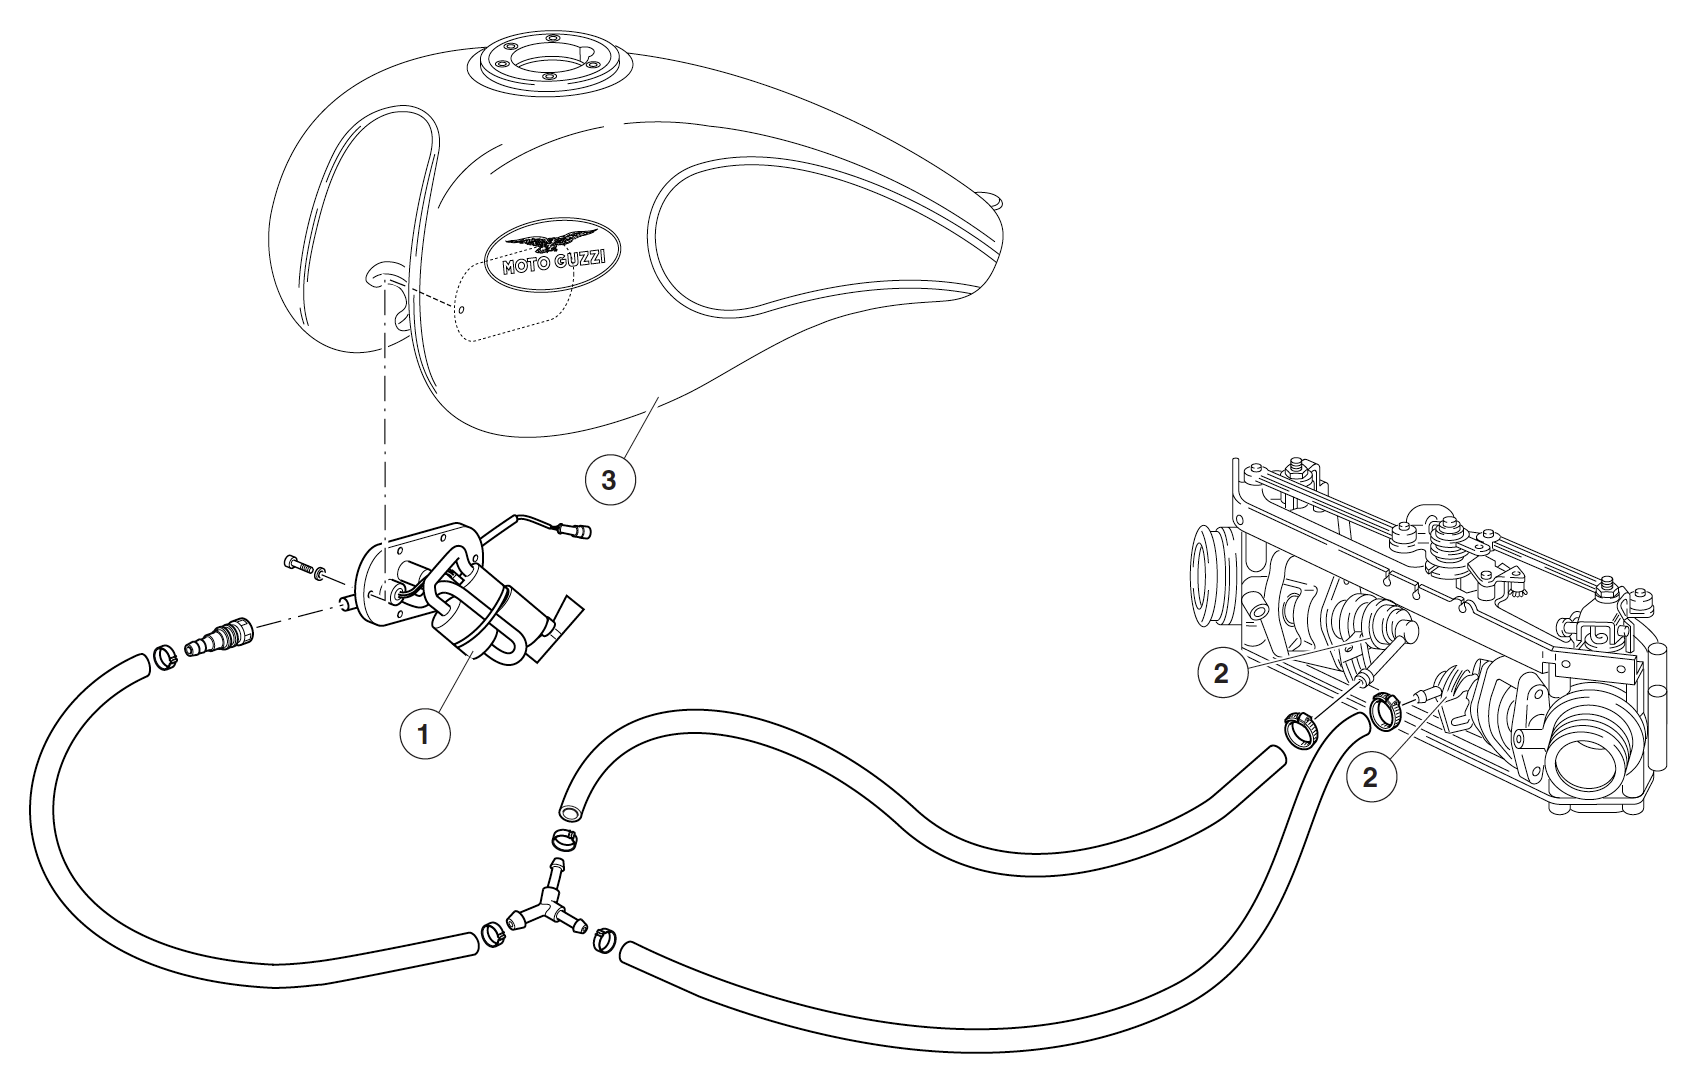
In-tank has a number of advantages, the pump is surrounded by liquid so it can stay cooler, it has an integral fuel pressure regulator so no return line, it’s got an integrated screen filter, and fuel-low light sensor.

So, the decision was to plumb this entirely externally, lose the fuel level sensor, and add an external regulator (what could go wrong??) – or, mount the pump in the tank of the trike which involves cutting a huge hole in the side of an other wise sealed fuel tank, and trying to get a pump to seal on diamond-plate aluminum.

We’re going in-tank.

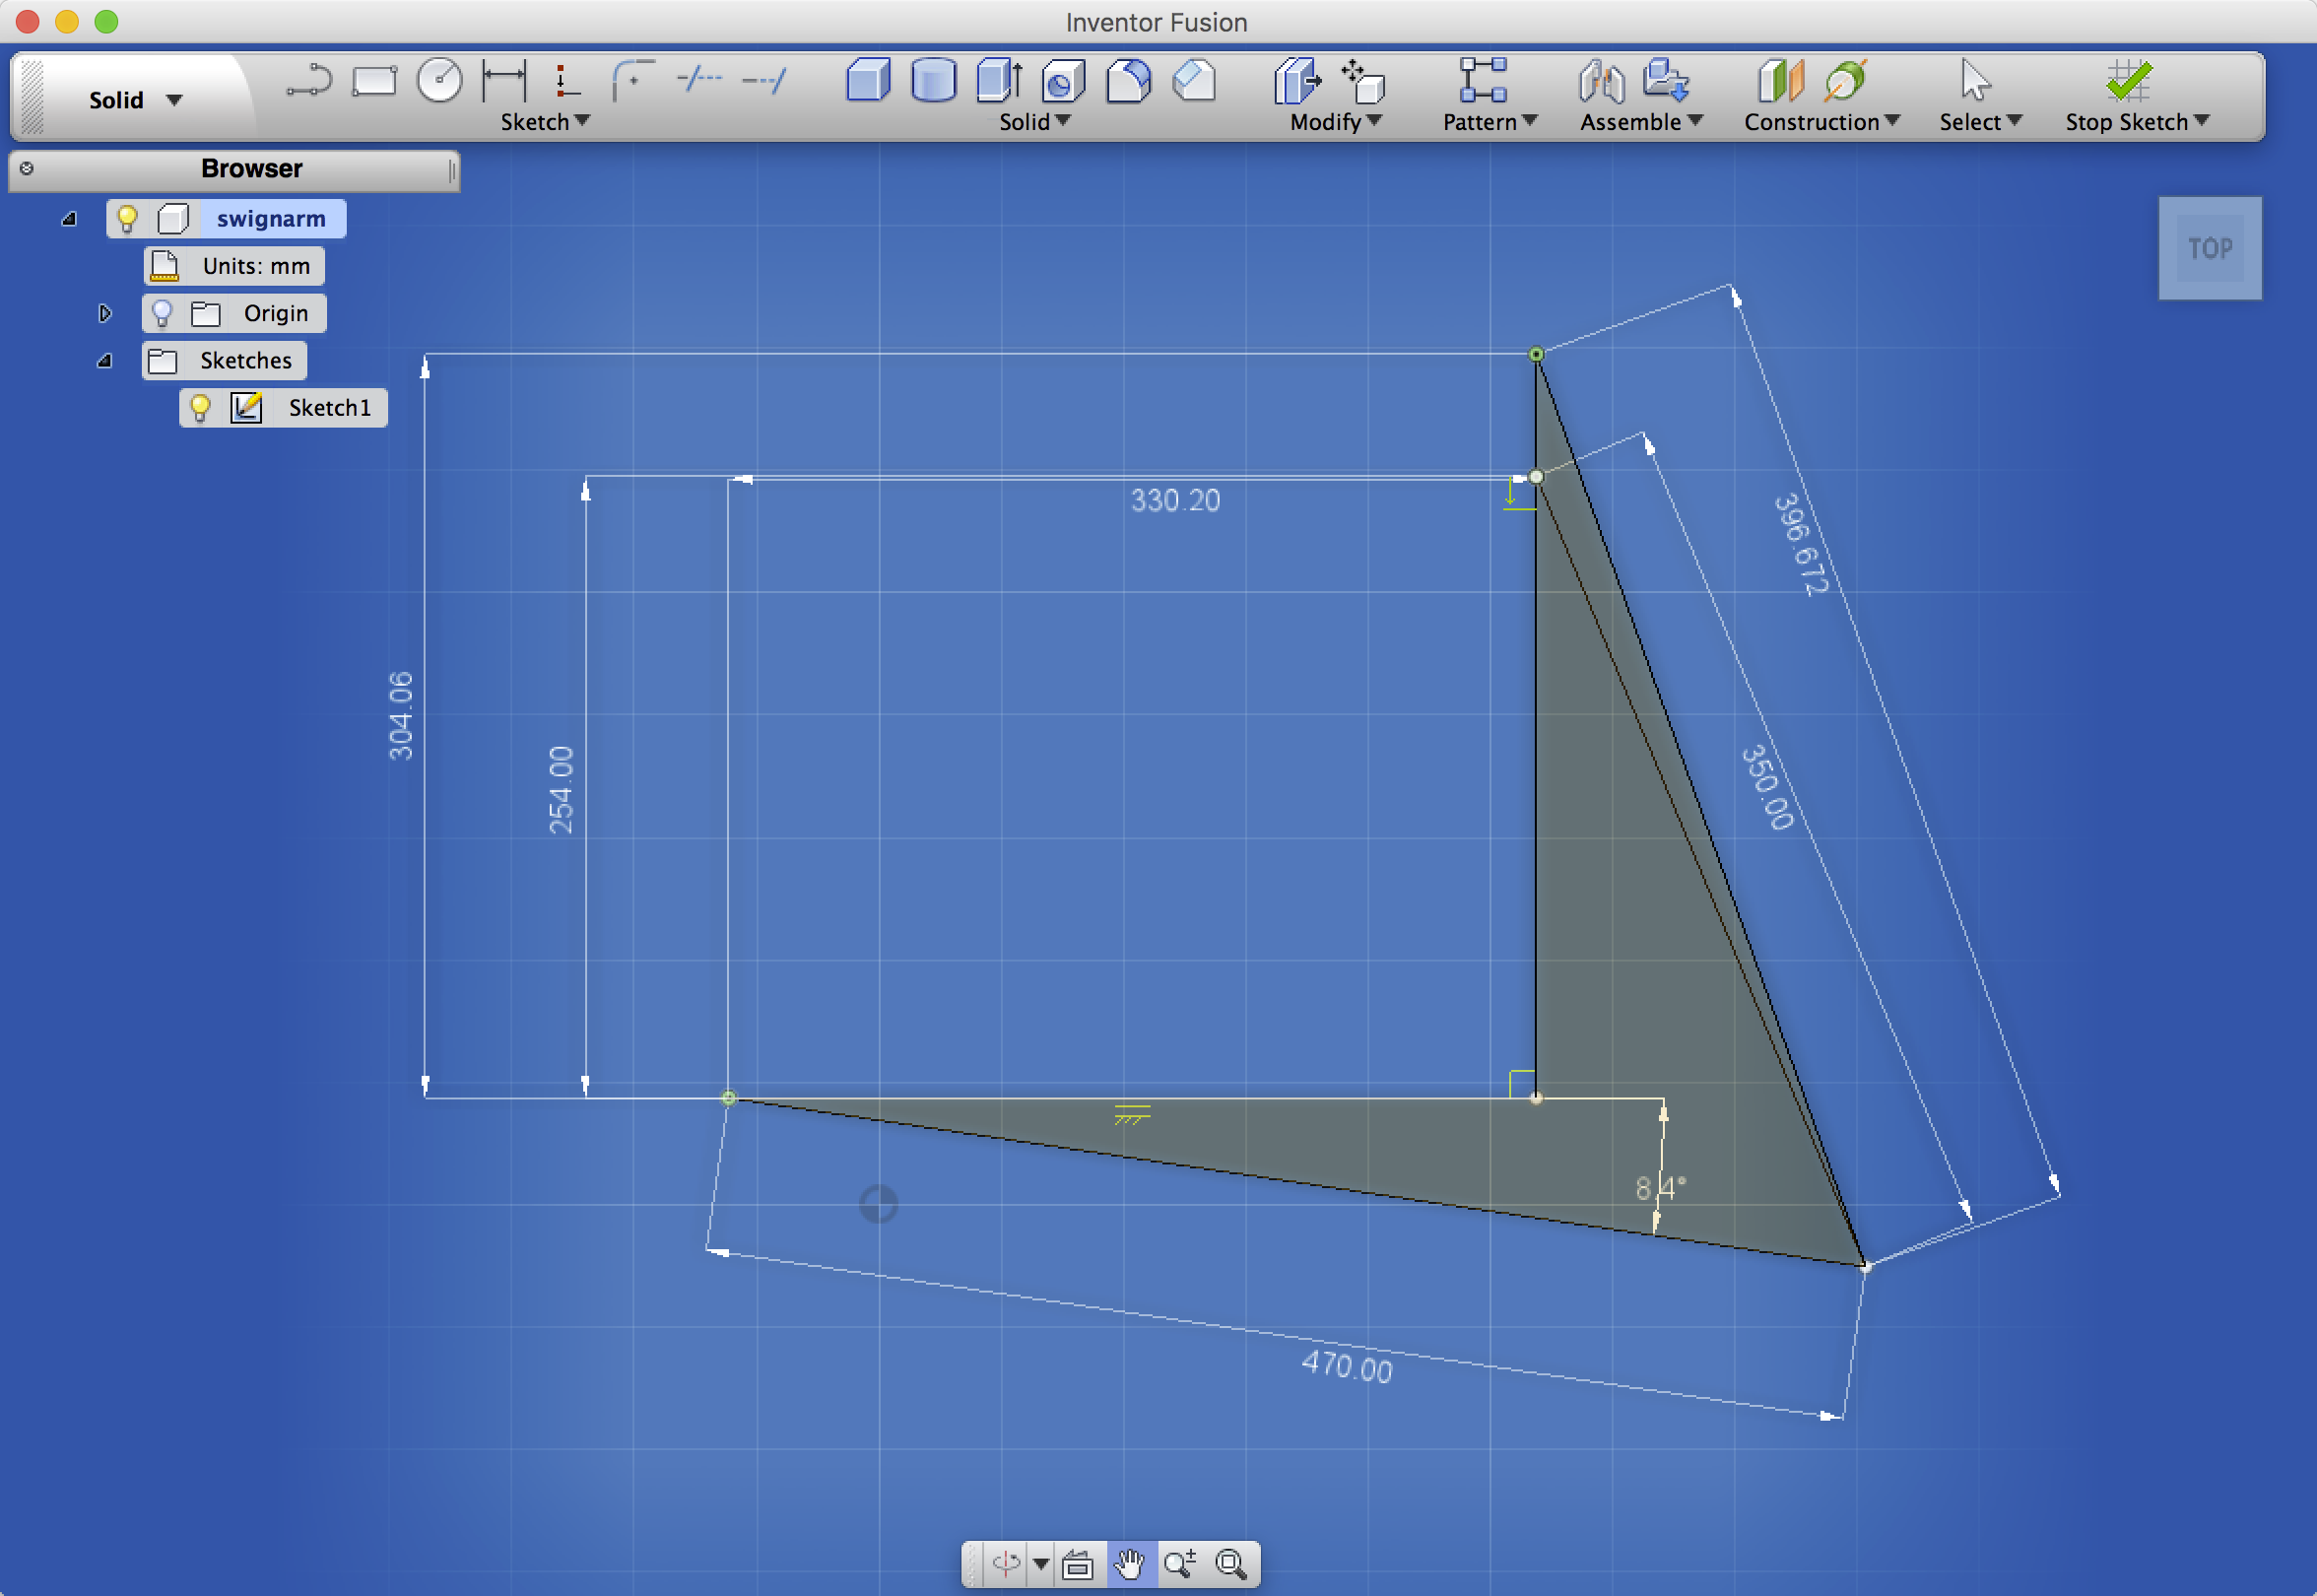
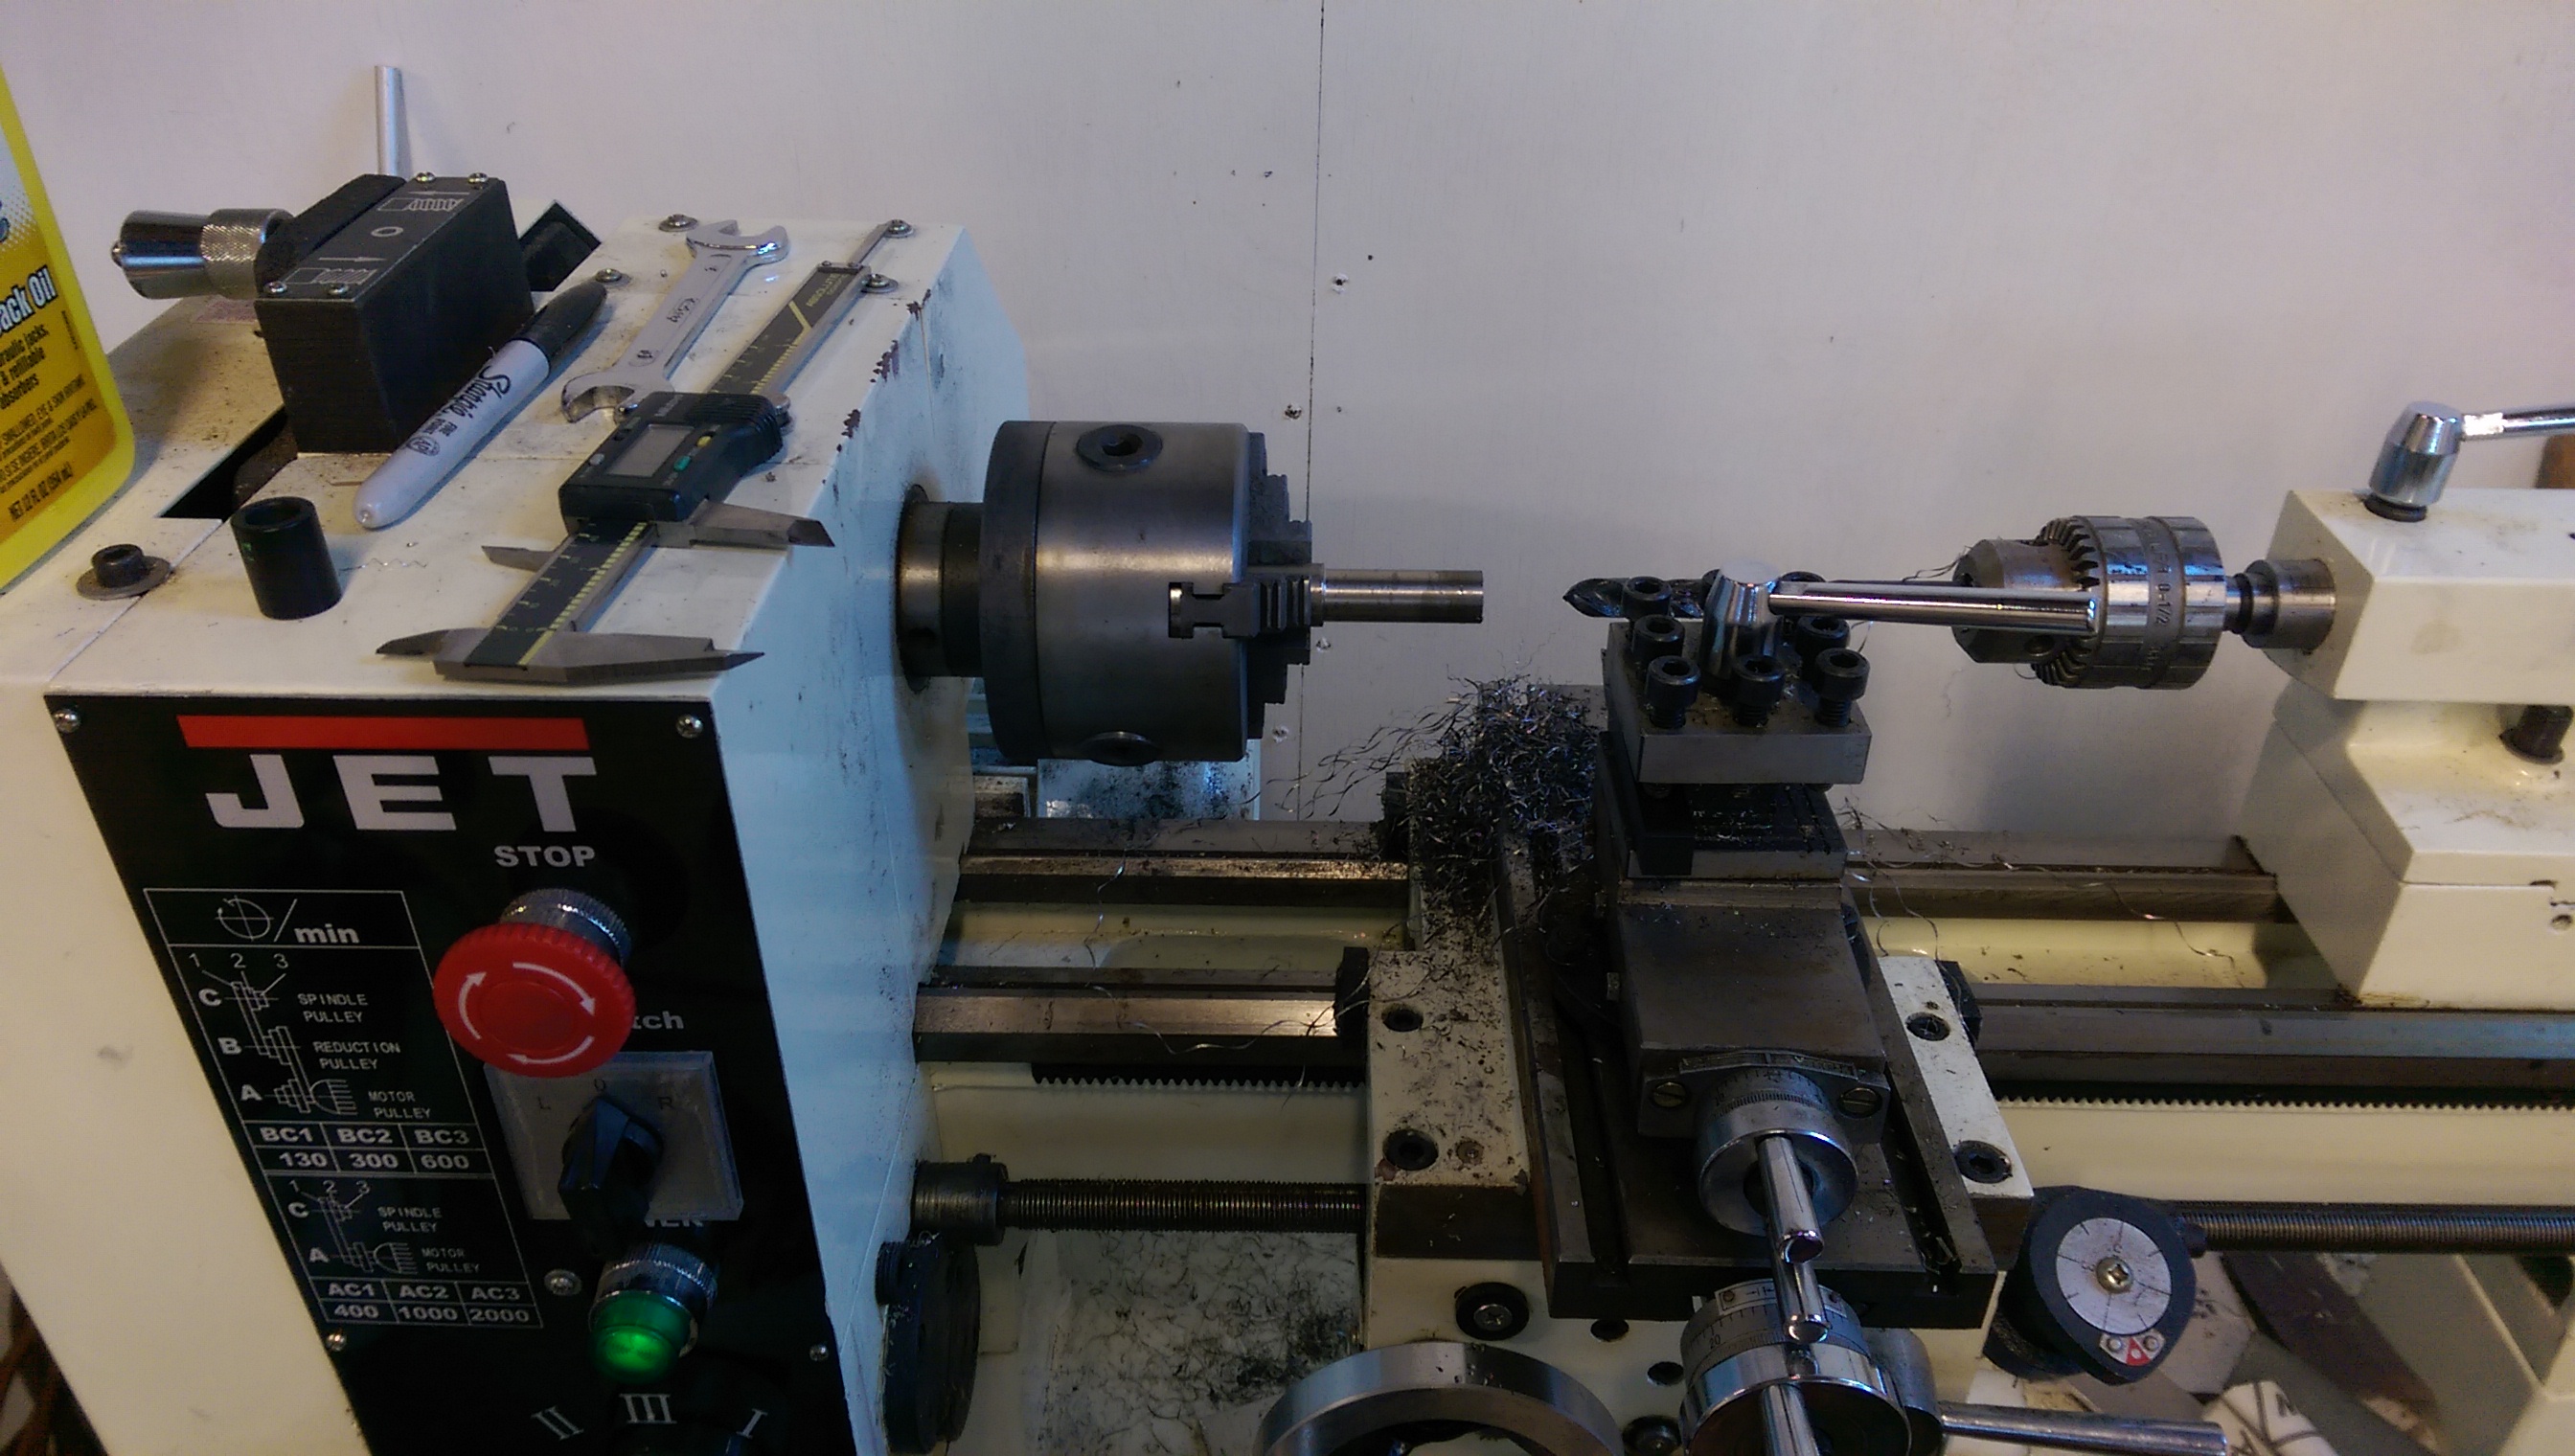
First step, a bit of CAD/CAM and some CNC work produced a “nut plate”, or a plate to put behind the opening.  This will have matching holes, and be threaded to give the bolts a flat surface to clamp against, and give the bolts enough thread to torque.  Metal is 6061-T6.

2016-09-17_1704

Then, using this as a template, cut a big hole in the side of the tank.  Sorry, no photos of that step.  Then, with a grinder, flatten down the diamonds to give a flat surface facing the pump.  That, plus some RTV and a new gasket should do it.

Et voila, the finished article – and this has fuel in it, sitting outside on a hot day.  If it’s not leaking now, it’s not going to leak for quite some time.

img_20160917_162323

Shocking

There are two lengths of swingarm on the Tonti frame – 390 and 470.  My donor bike is a later model Cal EV, so it has the longer swingarm.  Because of this additional length, the stock shocks won’t work given the upper mounts on the trike, so we had to do some geometry to figure out what to do.  The primary objective is to ensure that the shock is traveling in the middle of it’s stroke under most conditions, when loaded.  The stock shocks and springs given the new geometry would be operating over-center and with the wrong height.  So something has to change.

Quick CAD assignment to work out the new length:

2016-09-26_0753

That works out to 15.5″.  A quick scan through many shock providers, landed me at Progressive Suspension who has a gobsmacking selection of shocks and they publish their tech specs online.  That led me to these:

https://www.amazon.com/dp/B000UKGJU0/

UPDATE:  These units have far too much damping – the length and spring-rate are right, but the excessive damping causes the rear wheel to skip and crash.  I’ve added a new post in October to outline the update made to fix this.  All the rest of this post remains valid, however.

img_20160925_092442

img_20160925_092456

Fire up the lathe to make some inserts to adapt the upper and lower eyes to 12mm.

img_20160925_090031

img_20160925_092423

You will notice in this photo that the cross bolt at the top is carrying load on the threads.  This is of course, wrong.  I was only using the bolt that was handy to hold the suspension.  Proper length bolts will have the shank (unthreaded) portion of the bolt body carrying load across the “ears” of the upper mount.  This avoids carrying shear load on the thread.

img_20160925_095759

Here you can see the before and after – left is the stock shock, right is the Progressive shock.  The angle is quite different.  One could imagine that, once fully loaded, the stock shock would be operating on the wrong side of horizontal.  The Progressive side “looks” about right.

swing-compare

Hurry-up and Wait – Indicate! – an update

Took some time off in October to do some travel, and that’s no matter because I was waiting 3 mos for a clutch kit from Italy.

You see, the 2003 Cal EV came with a single-plate clutch (in addition to hydraulic lifters), which was a first for Guzzi at the time – and as a first, it came with problems (as did the lifters).  While the lifters had a recall, and the p.o. had that addressed, the clutch did too but the p.o. simply replaced the single-plate unit instead of upgrading.

The single-plate units suffered premature wear, needing replacement in as little as 10-15k miles.  When put into a vehicle that weights nearly 100% more than the bike, my gut says that the original single-plate unit is at risk.  Guzzi has a kit, which I ordered from Moto Intl, and 3 mos later – it arrived.  And man is it heavy.

So, it’s off to Ed at GuzziPower to lighten – hoping that’s back by end of Nov.

Doesn’t mean no-progress however, as lots of time has been spent on wiring, dash panel, axle clearance hole, front suspension, rear parking brake, and more.

Today, let’s talk about indicators.  Equip from Arthur utilizes a MINI part, but I think from a Mk3.  It’s meant for the opposite side of the column as it’s a UK part.  I ordered a MK2 indicator from 7Enterprises:

http://www.7ent.com/products/turn-signal-switch-mk2-35840.html

It’s a cleaner and smaller unit.  However, since it lives inside the steering column, it’s kinda exposed and ugly.  So, I opened up my CAD software, and designed an enclosure, which I sent off to Sculpteo to be 3D printed.

2016-10-30_1323

And here is the result (mk3 on the right, mk2 on the left):

img_20161113_095016

img_20161113_095053